
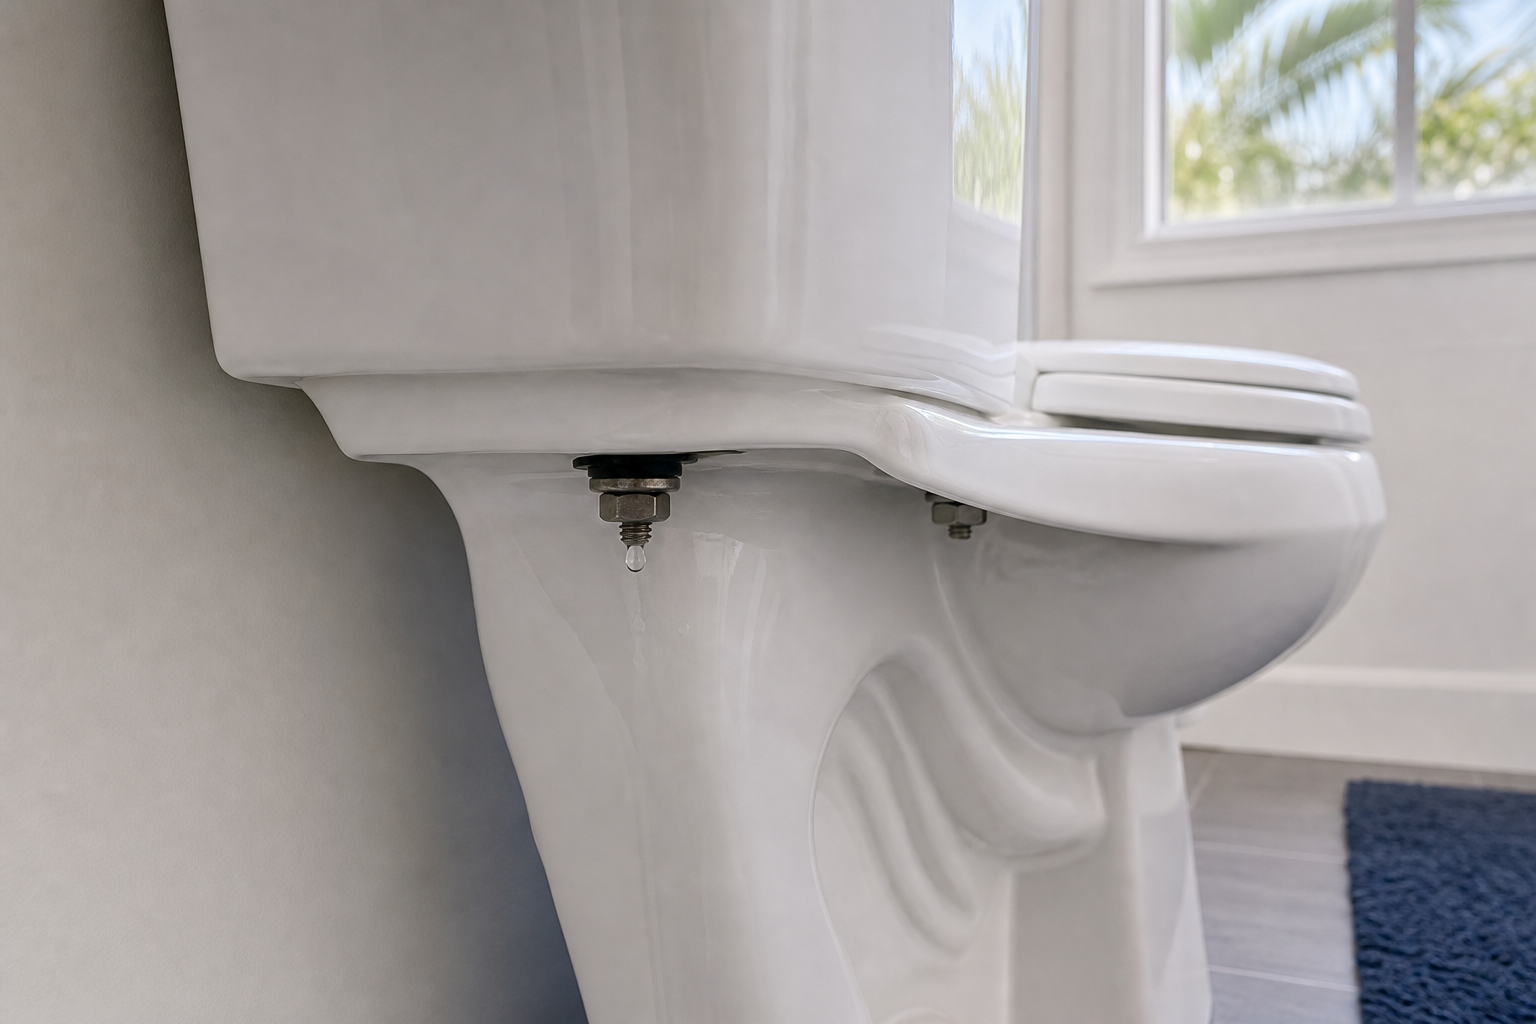
Water dripping from a bolt beneath the toilet tank often means water is following the mounting hardware through a worn or displaced rubber washer. That is not the only possible source. A loose supply connection, a leaking fill-valve seal, condensation, a failed tank-to-bowl gasket, or a small porcelain crack can send water toward the same spot.
Stop flushing until you know where the water begins. Dry the tank, joint, supply line, and floor, then watch for the first place moisture returns. If water continues to collect, the tank shifts, or the porcelain appears cracked, close the toilet’s shutoff valve without forcing it and arrange a professional inspection.
What the Tank Bolts Do
A two-piece toilet has a separate tank and bowl. Mounting bolts pass through openings in the bottom of the tank and through the bowl’s rear mounting ledge. Rubber sealing washers help keep tank water from following the bolt openings. Washers and nuts below the mounting surfaces hold the tank in place.
The exact hardware arrangement varies by toilet model. Some assemblies use additional washers or nuts between the tank and bowl. The central tank-to-bowl gasket seals the larger flush opening between the two pieces. All of these parts must sit correctly so the tank remains stable without putting uneven stress on the porcelain.
Rubber hardens, flattens, cracks, or shifts over time. Metal hardware can corrode. A previous repair may also leave mismatched parts or uneven tension. When the seal at a bolt opening stops working, water can trace the threaded shank and form a drop at the nut below.
Protect the Floor Before Tracing the Leak
Place an absorbent towel beneath the tank-to-bowl joint and stop using the toilet while you investigate. Repeated flushing adds water and can spread damage into flooring, baseboards, or the ceiling below.
If the leak is active, turn the nearby shutoff valve clockwise using normal hand pressure. Do not force a stuck valve. A corroded or fragile valve can begin leaking when disturbed. If the valve will not close, or water continues entering the tank, use the home’s main water shutoff only if you know its location and can operate it safely.
Do not reach into a full tank to tighten or remove mounting hardware. Draining and disassembly require control of the water supply and support for the tank. A tank that shifts unexpectedly can crack or cause injury.
Find Where the Moisture Starts
Water does not always fall straight from its source. It can follow the bottom of the tank, a bolt, the porcelain ledge, or a supply hose before it becomes visible. Drying the entire area first makes the source easier to distinguish.
Check these areas separately:
- The supply hose and both threaded connections. Moisture at the shutoff or fill-valve connection can run toward the tank bolts.
- The fill-valve shank where it passes through the tank. A failed seal there may wet the underside of the tank.
- The outside surface of the tank. Condensation usually appears as widespread dampness rather than one concentrated bolt-path drip.
- The tank-to-bowl centerline. Water emerging closer to the large central opening may point to the main gasket instead of a bolt washer.
- Each mounting bolt. A localized wet ring inside the tank or a drop forming on the same bolt below makes that sealing path more suspect.
- The porcelain around every opening. A hairline crack or chipped mounting hole changes the repair decision.
A flashlight and a dry tissue can help identify the first damp point without moving the fixture. Avoid adding dye, cleaner, sealant, or other material that can obscure the source or complicate repair.
Why Tightening the Nut Is Not a Safe Shortcut
A dripping nut may look like a simple tightening job. Porcelain does not tolerate the same force as metal plumbing parts. Tightening one side too much can tilt the tank, crush a rubber washer, stress the mounting hole, or crack the tank or bowl.
Uneven tightening can also leave the central gasket compressed on one side and loose on the other. The leak may stop briefly and return after the tank moves during normal use. If the hardware is corroded, turning the nut can spin the bolt inside the tank or damage the sealing surface.
Never brace the tank with excessive force or use an impact tool on toilet hardware. A stable, leak-free connection depends on the correct parts, clean sealing surfaces, even alignment, and controlled hand tightening based on the fixture design.
Bolt Washer Leak or Tank-to-Bowl Gasket Leak?
A bolt washer seals a relatively small opening around one mounting bolt. A tank-to-bowl gasket seals the large outlet where flush water enters the bowl. Both can age at the same time, and water can spread across the underside before it drips.
Moisture concentrated around one bolt opening supports a bolt-seal concern. Water that appears mainly during or immediately after flushing and spreads from the center of the joint may support a tank-to-bowl gasket concern. These patterns help guide inspection, but they do not prove the cause on their own.
Replacing only the visibly wet nut does not renew the rubber seal inside the tank. A lasting repair may require removing and supporting the tank, inspecting the porcelain, cleaning the sealing surfaces, and installing a compatible bolt-and-washer set. Depending on condition and model, the plumber may recommend replacing the central gasket during the same controlled disassembly.
What a Plumber Checks Before Repair
A plumber first confirms that the supply connection, fill-valve seal, condensation, and nearby fittings are not sending water toward the mounting hardware. The tank should sit squarely without rocking. The porcelain around the mounting holes and flush opening should be intact.
After the water is shut off and the tank is drained, the plumber can inspect the internal bolt heads, rubber washers, external washers and nuts, and central gasket. Corrosion, flattened rubber, mineral tracks, uneven hardware, or an incompatible repair kit can explain why the seal failed.
If the porcelain is sound, the repair commonly involves supporting and removing the tank, replacing worn sealing parts with components that fit the toilet, aligning the tank, and tightening the hardware evenly. The toilet is then refilled and tested through multiple flushes while each connection is checked for renewed moisture.
For a focused assessment and repair path, MAP Plumbing and Rooter’s toilet repair service in Los Angeles can evaluate the fixture and the source of the leak.
When the Toilet May Need Replacement
Worn washers or a failed gasket do not automatically mean the entire toilet must be replaced. Sound porcelain and accessible, compatible hardware often make a targeted repair practical.
Replacement becomes more likely when the tank or bowl has a crack, a mounting hole is chipped, the tank cannot sit securely, correct parts are unavailable, or repeated repairs have not produced a stable seal. A crack should not be patched or hidden with sealant and returned to normal use. Water pressure and movement can worsen the damage without warning.
The age of the fixture alone does not decide the outcome. The plumber should consider porcelain condition, tank stability, hardware compatibility, the condition of related seals, and whether a reliable leak test can be completed after repair.
Arrange Toilet Repair Before the Drip Spreads
A small bolt-path leak can remain easy to overlook until it stains flooring or damages material below the bathroom. Keep the area dry, avoid further flushing, and leave the tank undisturbed if the source is uncertain.
MAP Plumbing and Rooter can inspect the toilet tank, trace the water to its starting point, and explain whether sealing hardware, the tank-to-bowl gasket, another connection, or the fixture itself needs attention. Contact the team for toilet repair in Los Angeles when moisture returns after drying, the tank moves, the shutoff does not operate normally, or the porcelain may be damaged.